
1. Node.js 공식 사이트에서 Linux Binary 를 다운받는다

2. FreeISO 로 이 파일을 ISO 파일로 만든다 (과정생략)
3. CDROM 을 이용하여 파일을 내 폴더에 넣고 압축을 푼다 (과정생략, 에러사항 기술)
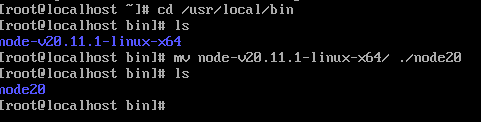
나는 node.js 파일을 이곳에 풀었다
/usr/local/bin
Cannot mkdir : Read-only file system 오류발생
CDROM 을 마운트한 곳에서 바로 압축을 푸려고 하니까 이런 오류가 발생하였다. 마운트된 곳에서 파일을
/usr/local/bin 으로 옮기니(cp로 옮겼다, mv는 오류) 해결되었다

4. 실행해보기
[node-v20] - [bin] 에 들어가면 node가 보인다
실행하기
cd /usr/local/bin/node로 시작하는 긴 파일 이름/bin/./node

5. 매번 파일에 들어와서 실행하지 않게 설정하자
dnf로 다운받은 프로그램은 systemctl 에 등록되어 쉽게 실행가능하지만, 우리는 binary 파일이므로 설정작업 시작!
설정에 앞서, node 이름이 너무 길길래 나는 node20 으로 바꾸고 설정을 시작하였다
vi /etc/profile.d/node.shexport PATH=$PATH:/usr/local/bin/node20/bin/
저장 후 변경사항 적용
source /etc/profile.d/node.sh
이제 아무곳에서 node 를 치면 !

6. 서버를 실행해보자
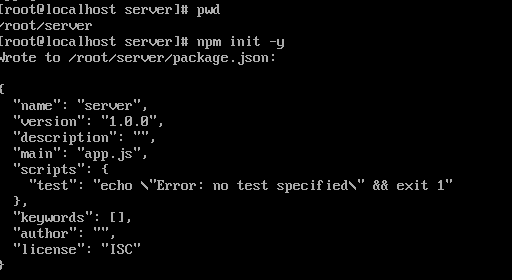
나는 루트의 홈디렉토리에 server라는 폴더를 만들었다
cd

mkdir server

cd server
server 디렉토리에서 서버에 필요한 기능들을 먼저 설치하자 ( 아래의 모든 작업은 server 디렉토리 안에서 진행 )
npm init -y
npm i express
touch index.html

vi index.htmlapp.js 에 간단한 서버를 넣어보자 ( 전체 다 복붙 )
const express = require('express');
const path = require('path');
const { exec } = require('child_process');

const app = express();
const port = 8088;

app.use(express.json());
app.use(express.urlencoded({ extended: true }));

app.get('/',(req,res)=>{
    res.sendFile(path.join(__dirname,'index.html'))
})

app.post('/submit', (req, res) => {
    const { username, password } = req.body;

    if(password.length < 8){
        return res.send(`<html><body><script>alert('비밀번호는 최소 8글자 입니다'); window.history.back();</script></body></html>`)
    }

    const useraddCommand = `useradd -m -p $(openssl passwd -1 ${password}) ${username}`;

    exec(useraddCommand, (error, stdout, stderr) => {
        if (error) {
            console.error(`exec error: ${error}`);
            return res.send(`<html><body><script>alert('Error adding user.'); window.history.back();</script></body></html>`);
        }


        return res.send(`<html><body><script>alert('User added successfully. Going back.'); window.history.back();</script></body></html>`);
    });


});

app.listen(port, () => {
    console.log(`Server running on port ${port}`);
});
touch index.htmlvi index.html
간단한 html 파일을 넣어보자 ( 전체 다 복붙 )
<!DOCTYPE html>
<html lang="en">
<head>
    <meta charset="UTF-8">
    <meta name="viewport" content="width=device-width, initial-scale=1.0">
    <title>Document</title>
</head>
<style>
    .container{
        width: 500px;
        height: 500px;
        position: absolute;
        top: 50%;
        left: 50%;
        transform: translate(-50%,-50%);
        box-shadow: inset 0 4px 8px rgba(0, 0, 0, 0.2);
        display: flex;
        flex-direction: column;
        justify-content: center;
        align-items: center;
       }


.login-form h2 {
    margin: 0 0 20px 0;
    text-align: center;
}

.input-container {
    margin-bottom: 20px;
}

.input-container label {
    display: block;
    margin-bottom: 5px;
}

.input-container input {
    width: 150px;
    padding: 10px;
    border: 1px solid #ccc;
    border-radius: 4px;
}

button {
    width: 100px;
    padding: 10px;
    background-color: #007bff;
    border: none;
    border-radius: 4px;
    color: white;
    cursor: pointer;
}

button:hover {
    background-color: #0056b3;
}
</style>
<body>
    <form action="/submit" method="post">
        <div class="container">
                <div class="input-container">
                    <label for="username">Username</label>
                    <input type="text" id="username" name="username" required>
                </div>
                <div class="input-container">
                    <label for="password">Password</label>
                    <input type="password" id="password" name="password" required>
                </div>
                <button type="submit">Submit</button>
        </div>
    </form>
</body>
<script>

</script>
</html>
준비 끝 ! ( server 디렉토리 안에서 이제 서버를 실행해보자 )
node app.js
8088 번으로 포트를 열었다고 뜨면 성공이다

방화벽으로 8088 포트를 열어두고 ( 8080 아닙니당)
firewall-cmd --permanent --add-port=8088/tcpfirewall-cmd --reload
다른 컴퓨터에서 접속이 되는지 확인해보자!
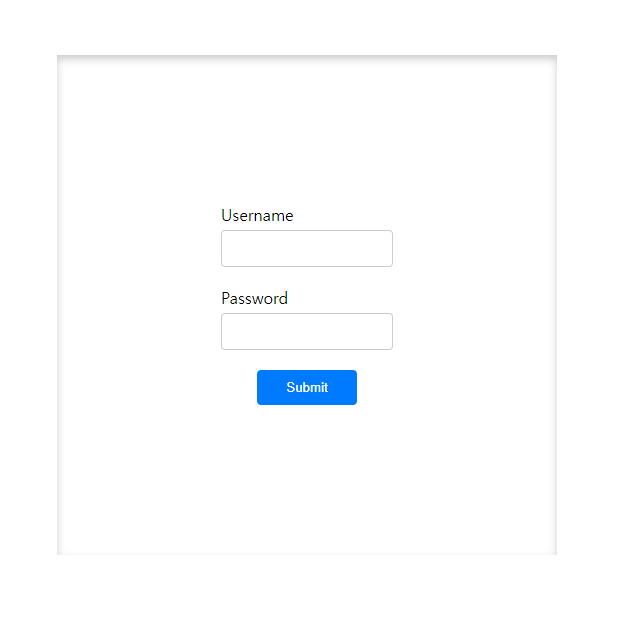
이런 페이지가 나오면 성공이다
다음 글에서는 아이디 비밀번호 입력을 통해서 ssh 계정과 비밀번호를 만들어보자
'기타 > 서버&클라우드' 카테고리의 다른 글
| 서버 & 클라우드 교육 12일차 (0) | 2024.03.08 |
|---|---|
| [ 온프레미스 서버 구축 실습 -2] 웹페이지로 리눅스 유저 생성하고 SSH 접속하기 (0) | 2024.02.29 |
| 서버 & 클라우드 교육 11일차 - 오라클 DB 설치 (0) | 2024.02.28 |
| 서버&클라우드 교육 10일차 - 원격지 시스템 관리 (0) | 2024.02.27 |
| 서버&클라우드 교육 8일차 (0) | 2024.02.23 |